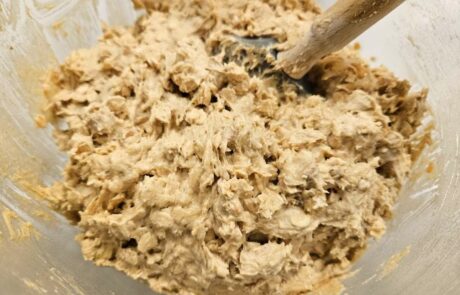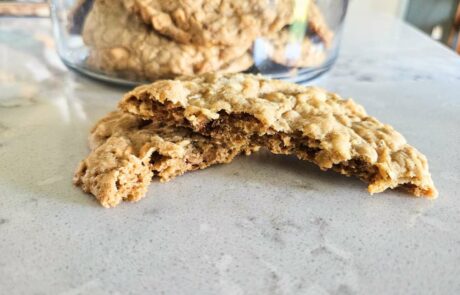
These cookies combine the rich sweetness of butterscotch chips, the heartiness of oats, and the subtle tang of sourdough discard for a delightful flavor. But the true magic lies in getting the perfect texture: crispy edges with a chewy, soft center. Below are some tips to help you achieve cookie perfection!
Achieving the Ideal Cookie Texture
For this recipe, I love a cookie with slightly crisp edges and a chewy center. To get this texture, it's important to flatten the cookie dough slightly before baking. This allows the edges to crisp up while keeping the center soft. If you prefer a thicker, softer cookie, skip this step and leave the dough in a ball.
Refrigeration Tips for a Thicker Cookie
While refrigeration isn’t necessary, if you like a thicker cookie, refrigerate the dough for at least 30 minutes before baking. This will keep the cookies from spreading too much, giving you a more compact and dense bite. And remember, if you chill the dough, there's no need to flatten the cookies before baking!
Health Benefits of Using Sourdough Discard in Cookies
Sourdough discard is more than just a great way to use up leftovers from your starter—it can actually enhance the texture, flavor, and nutritional profile of your cookies. Here's why incorporating sourdough discard in your cookie dough is beneficial:
- Softness: Sourdough discard helps contribute to a softer cookie texture, making each bite tender and chewy.
- Subtle Tang: While the tang of sourdough is more noticeable in bread, using discard in cookies adds just a hint of that characteristic sourdough flavor without overpowering the sweetness.
- Improved Digestibility: Sourdough fermentation helps break down proteins found in flour and oats, making these cookies easier on your digestive system. This process can also degrade gluten, which may make the cookies more tolerable for people with mild gluten sensitivities.
- Health Benefits: The fermentation process in sourdough discard can generate prebiotic compounds, which help support beneficial gut bacteria. This adds an extra layer of health benefits to your sweet treat!
Health Benefits of a Cold Ferment
For an even deeper flavor and more health benefits, you can opt for a cold ferment by refrigerating the dough overnight. This extended fermentation process enhances the digestibility of the cookies by further breaking down proteins and starches, while also developing a more complex flavor. Just be sure to let the dough return to room temperature before baking for the best results.
Using sourdough discard is an easy way to bring more flavor, nutrition, and texture to your cookies, while also supporting gut health and improving gluten tolerance. It’s a win-win for your taste buds and your body!
The Chewiness Factor: Sprouted Oats
Want to add extra chewiness to your cookies? I love using sprouted oats in this recipe. They not only provide a heartier texture but also add a nutritional boost. If you haven’t tried them before, they’re a great option for any cookie recipe that calls for oats.
Don’t Overbake!
These cookies will seem soft when you first take them out of the oven, but don’t be tempted to keep them baking until they turn golden brown. The cookies will firm up as they cool, thanks to the butter and sugar, resulting in a perfectly chewy texture. If you prefer crispier cookies, you can bake them a minute or two longer, but be aware that they won’t have that irresistible chewiness.
Customizing Your Cookies
This base recipe is incredibly versatile! Whether you prefer your cookies crispier or chewier, you can easily adjust the baking time or dough handling to match your preferences. Plus, you can swap in or add your favorite mix-ins to truly make the recipe your own. Try adding dark chocolate chips, dried cranberries, or a handful of chopped nuts for extra crunch and flavor. The possibilities are endless—experiment with different flavors like white chocolate, dried fruit, or even seeds to create your perfect cookie!
Why You Should Use a Kitchen Scale to Weigh Your Ingredients
-
- Consistency: Measuring cups can be imprecise. Depending on how packed the flour is or the humidity in the air, you could end up with too much or too little of an ingredient. A kitchen scale eliminates this variability and gives you the same result every time.
- Better Texture: In baking, small differences in ingredient amounts can drastically affect the texture. For example, too much flour could lead to dense, dry cookies, while too much sugar could make them spread too thin. Weighing your ingredients ensures you achieve the perfect balance, giving you that ideal chewy center with crispy edges.
- Sourdough Starter Precision: When working with sourdough discard, precision is key. The weight of the discard can vary depending on how bubbly it is. Using a kitchen scale allows you to add exactly the right amount, ensuring your cookies bake up beautifully.One of the best tips I can give for consistently perfect cookies—or any baked goods—is to use a kitchen scale to weigh your ingredients. Measuring by weight, rather than volume, ensures accuracy and precision. Here’s why it makes such a difference:
So, for the best possible results, grab your kitchen scale and weigh out each ingredient for consistently delicious and perfectly textured cookies every time!
Why You Should Use a Cookie Scoop (Ice Cream Scoop)
- Using a cookie scoop (or ice cream scoop) is a game-changer for baking cookies, especially when you're aiming for consistently shaped and evenly baked treats. Here’s why I always recommend using one:
- Uniform Size and Shape: A cookie scoop ensures that every cookie is the same size and shape, which means they’ll bake evenly. No more undercooked or overcooked cookies because of uneven portions!
- Less Mess, More Efficiency: Using a scoop keeps your hands clean and the process quick. Scooping dough with a spoon or by hand can be sticky and time-consuming, but a cookie scoop allows you to quickly portion out perfect dough balls with minimal mess.
- Better Presentation: If you want those bakery-style cookies with uniform, professional-looking shapes, a cookie scoop is the tool for the job. The even size makes your cookies look polished and appealing.
Whether you’re aiming for small or large cookies, a cookie scoop helps you create consistently beautiful and perfectly baked batches every time!
Baking Powder vs. Baking Soda: What’s the Difference?
Both baking powder and baking soda are essential leavening agents used in baking, but they work in different ways and are not interchangeable. Here's a quick breakdown:
- Baking Soda (Sodium Bicarbonate): Baking soda is a strong base that requires an acidic ingredient (like sourdough discard, vinegar, or buttermilk) to activate and produce carbon dioxide bubbles. These bubbles help the dough rise and give your cookies a light, airy texture. Without the acid, baking soda won’t work properly, and your cookies could turn out flat.
- Baking Powder: Baking powder contains both an acid (cream of tartar) and a base (baking soda), so it doesn’t need an additional acidic ingredient to work. It’s a complete leavening agent, making it great for recipes that don’t contain enough natural acid. Baking powder often results in a lighter texture with a softer crumb.
In this recipe, we use baking soda because the sourdough discard provides the necessary acidity to activate it, helping the cookies rise and achieve that chewy yet slightly crisp texture. Understanding the difference between the two will help you choose the right leavening agent for any recipe!

Sourdough Discard Butterscotch Oatmeal Cookies with Coconut
- Total Time: 30 minutes
- Yield: 36 cookies 1x
Description
These delicious cookies are made with sourdough discard, oatmeal, butterscotch chips, cinnamon, and coconut for a soft and flavorful treat. Perfect for using up your sourdough discard and satisfying your sweet tooth!
Ingredients
- 1 cup (225g) softened butter
- 1 cup (190g) sugar
- 1 cup (190g) brown sugar
- 1/3 cup (75g) sourdough discard
- 2 large eggs
- 1 teaspoon vanilla extract
- 1 teaspoon baking soda
- 1/2 teaspoon cinnamon
- 1/2 teaspoon salt
- 2 1/3 cups all-purpose flour
- 2 1/2 cups old-fashioned rolled oats
- 1/2 cup (50g) of coconut
- 11 ounces of butterscotch chips
Instructions
- Preheat the oven to 350°F (177°C). Line a baking sheet with parchment paper or a silicone mat.
- In a large bowl, beat together the butter, granulated sugar, brown sugar, vanilla extract, and sourdough discard until the mixture is light and fluffy. Add the eggs one at a time, beating for about 1 minute until well combined.
- In a separate bowl, whisk together the flour, oatmeal, baking soda, cinnamon, and salt. Gradually add this dry mixture to the wet ingredients, mixing on a slow speed until well combined.
- Stir in the butterscotch chips and shredded coconut (optional) until evenly distributed throughout the dough.
- Roll the dough into balls using a heaping tablespoon of dough. Place them on the prepared baking sheet. For larger cookies, use an ice cream scoop. Lightly press down on each ball (see tips below for adjusting cookie thickness based on preference).
- Bake for 10-12 minutes, being careful not to over-bake. The cookies will look slightly soft but will achieve the perfect texture as they cool.
- Allow the cookies to rest on the baking sheet for at least 3 minutes before transferring them to a cooling rack to cool completely.
Notes
*Be sure to measure your flour correctly. I highly recommend using a digital kitchen scale to weigh your flour, or use the spoon and level method if you don’t have a scale. Improper measuring can cause cakey cookies, or cookies that don’t spread.
- Prep Time: 15
- Cook Time: 15
- Category: Dessert
- Method: Oven-Baked
- Cuisine: American


